In this Unity video player tutorial, we’ll explore how to bring dynamic video content into your Unity projects to enhance storytelling, instruction, or gameplay elements. Whether you’re building a cinematic cutscene, interactive training app, or a virtual art gallery, integrating video in Unity is more accessible than you might think. Creating immersive and interactive experiences often involves more than just animations and 3D models.
Unity provides a built-in video player component that makes it relatively simple to play and display videos. However, understanding the right workflow and setup is crucial to ensure smooth playback and performance, especially across different platforms. This guide walks you through the best practices and techniques to play and display videos effectively in Unity.
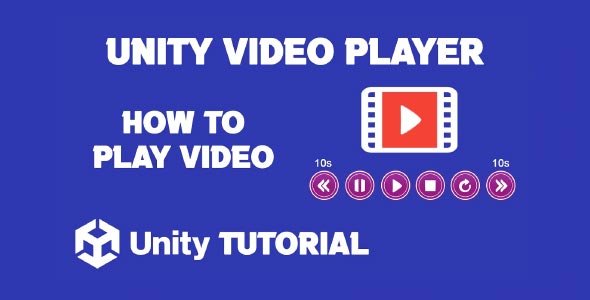
How To Play Video In Unity
Adding video content to your Unity scene begins with understanding how to play video in Unity using the built-in Video Player component. This powerful tool allows developers to stream video clips directly within the game environment or on UI elements.
The video player in Unity supports various formats like MP4, WebM, and others, allowing flexibility based on project needs. Before importing a video, ensure it’s encoded in a compatible format and optimized for the target platform. Poorly compressed files can lead to lag or broken visuals, especially on mobile or VR devices.
Once your video is ready and imported into Unity’s Assets folder, the next step involves attaching it to a Video Player component. This component can be added to any GameObject, such as a plane or a UI canvas, depending on where you want the video to appear. The source of the video can either be a local file or a URL, which opens up options for streaming video content online.
To achieve seamless video playback, developers often configure playback options such as looping, audio output mode, and playback speed. Adjusting these settings ensures that the video behaves consistently across various user interactions and platform capabilities.
How To Display Video In Unity
Mastering how to display video in Unity is just as important as knowing how to play it. Displaying video involves not only assigning it to a target object but also ensuring that the visual output looks polished and blends well with the scene.
There are two main approaches to displaying videos in Unity: rendering them on a 3D object or projecting them onto a UI element like a RawImage. Both methods have their advantages, and the choice depends on the context. For example, cutscenes or background visuals might be better suited to a 3D screen within the environment, while tutorials or UI-based experiences benefit from a more traditional 2D display. In this Unity video player tutorial, we focus on understanding these display options to help you choose the best method for your project’s needs.
To display videos effectively, the video’s Render Mode must be configured. Common options include rendering the video directly to a material or displaying it through a Render Texture. For UI-based playback, the Render Texture option is typically paired with a RawImage component, allowing the video to be shown within the user interface seamlessly.
Lighting and camera positioning also play a critical role in how the video is perceived. Poor lighting can reduce visibility, while incorrect camera angles might distort the video. By adjusting these parameters, developers can create visually rich experiences that align with their project’s artistic direction.
Optimizing Unity Video Playback Across Platforms
Unity’s versatility shines when it comes to deploying content across multiple platforms: PC, mobile, VR, AR, or consoles. However, when working with video, optimizing playback is essential to prevent performance drops or crashes.
Start by reducing the resolution and bitrate of videos where possible without compromising quality. It’s also a good practice to preload or buffer videos before displaying them, especially when streaming from a URL. This helps avoid sudden lags or black screens during playback.
Another key factor is choosing the right video format and compression method. For instance, H.264 in an MP4 container is widely supported and offers a good balance between quality and file size. Unity’s Video Player component handles this format efficiently, making it a preferred choice for most developers. A key part of learning how to play video in Unity is choosing formats that the Video Player component supports efficiently, which is why many developers favor this combination.
Memory management is also crucial. Long or high definition videos can quickly consume RAM, especially on mobile devices. By monitoring system resources and managing video lifecycles carefully, such as unloading clips when not in use, you can maintain optimal performance.
Creative Ways To Integrate Video Player In Unity Projects
Video content opens up a world of creative possibilities in Unity projects. From interactive story-driven games to corporate training simulations and educational apps, videos enhance user engagement significantly. This Unity video player tutorial highlights how integrating video can transform your project by adding rich, dynamic media that captures attention and conveys information effectively.
In gaming, videos are often used for storytelling—cutscenes, intros, and outros. In AR or VR applications, 360-degree video experiences transport users to real-world environments with immersive detail. Training applications can use step-by-step video guides embedded directly into the virtual scene, making the content feel intuitive and natural.
Understanding how to integrate video player in Unity is crucial in unlocking these possibilities. By using the Video Player component effectively, developers can focus more on creative storytelling rather than technical hurdles.
Equally important is knowing how to display video in Unity. Displaying a video at the right moment, with proper UI placement or scene integration, ensures that users stay immersed and informed throughout their journey.
Video Playback Issues Explained: A Unity Tutorial Guide
While Unity makes video playback relatively straightforward, some challenges still arise. One common issue is the video not appearing or playing with audio only. This usually stems from misconfigured Render Modes or missing Render Textures. Ensuring that the video is linked to the correct output target usually resolves the issue.
Another frequent problem is stuttering or freezing, especially on lower-end devices. This is often due to high-resolution files or insufficient compression. Reducing the resolution, encoding in a more optimized format, or using hardware decoding (where available) can improve performance.
Compatibility across platforms is also a concern. Not all formats work seamlessly on all devices. Testing videos on each target platform and adapting as needed is part of the process when scaling Unity applications.
Conclusion
This Unity video player tutorial has walked you through the essential concepts for bringing video into your Unity projects, highlighting both the technical setup and creative opportunities. Whether you’re working on a game, an AR/VR experience, or an educational app, the ability to seamlessly incorporate video can significantly enhance user engagement and storytelling. With Unity’s native Video Player component and a solid understanding of rendering techniques, even complex video experiences can be created without third-party tools.
Understanding how to play video in Unity is more than just adding a clip and pressing play. It’s about controlling playback, optimizing for performance, and ensuring compatibility across platforms. From selecting the right video format to setting up looping, audio output, or streaming from a URL, thoughtful implementation is key to a smooth user experience. Once mastered, this functionality opens the door to cinematic sequences, tutorials, background ambience, and more—all directly within your scene.
Equally important is knowing how to display video in Unity so that it aligns with your project’s visual and functional goals. Whether you’re rendering onto 3D objects for environmental storytelling or integrating video into UI elements for instructional overlays, proper display setup ensures that video content is both effective and visually integrated.

Script: VideoControl.cs
using UnityEngine;
using UnityEngine.Video;

public class VideoControl : MonoBehaviour
{
    public VideoPlayer videoPlayer;

    public void PlayVideo()
    {
        if (!videoPlayer.isPlaying)
        {
            videoPlayer.Play();
        }
    }

    public void PauseVideo()
    {
        if (videoPlayer.isPlaying)
        {
            videoPlayer.Pause();
        }
    }

    public void StopVideo()
    {
        if (videoPlayer.isPlaying)
        {
            videoPlayer.Stop();
        }
    }

    public void RestartVideo()
    {
        videoPlayer.Stop();
        videoPlayer.Play();
    }

    public void SkipForward(float seconds = 10f)
    {
        if (videoPlayer.isPlaying)
        {
            videoPlayer.time += seconds;
        }
    }

    public void SkipBackward(float seconds = 10f)
    {
        if (videoPlayer.isPlaying)
        {
            videoPlayer.time -= seconds;
        }
    }
}
NOTE: If you want to play the video from start, just remove the script, buttons and Tick “Play On Awake” in VideoPlayer Component from inspector.
To create a more immersive experience in your Unity video projects, it’s important not only to handle the video playback correctly but also to incorporate audio elements effectively. If you’re looking to enhance your scene with music, check out this guide on How To Add Background Music Unity, which walks you through the steps of integrating background audio seamlessly alongside your video content.
