A pause menu Unity tutorial offers a practical way for developers to enhance gameplay flow and add a layer of professionalism to their projects. Whether you’re creating a fast-paced action title or a thoughtful puzzle game, the ability to pause gameplay is more than just a convenience. It adds professionalism, improves user control, and enhances the player experience in a big way.
In any game, there will be moments when players need to take a break. They might want to step away for a few minutes, adjust their settings, or simply reflect on their progress. Having a reliable pause menu gives them that option and keeps the flow of gameplay smooth and respectful of their time.
Unity Game Pause Menu
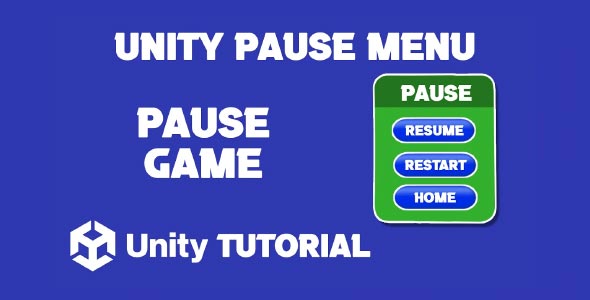
Designing a functional Unity game pause menu involves more than just freezing gameplay. It’s about giving players access to essential features without disrupting their immersion. A good pause menu typically includes options like resume, restart, settings, or even a quit button, depending on the game’s complexity.
The layout and appearance of your pause menu should match the overall theme of your game. If your game has a dark, atmospheric tone, then the menu should reflect that with similar colors and design choices. A light-hearted platformer, on the other hand, might feature brighter colors and more playful icons.
Placement of menu elements also matters. Buttons should be easy to read and reach, especially on touch devices or smaller screens. Animations can make transitions smoother, such as a fade-in effect when the menu appears. These little touches help the menu feel integrated into the gameplay rather than an afterthought.
Accessibility is another factor to consider. Making sure your menu is navigable with keyboard, controller, or touch input ensures all players can use it comfortably. Visual cues, clear labels, and logical button placement all contribute to a better user experience.
Unity Simple Pause Menu
For many developers, starting with a Unity simple pause menu is a practical way to learn the basics of UI and game flow. A simple menu typically includes just the essential functions like pausing and resuming gameplay, and possibly a quit or settings option.
Even with a minimal design, a simple pause menu can have a big impact on usability. It creates a clear break in gameplay, giving players a chance to regroup. This is particularly important in fast-paced or difficult games where players may need a breather between intense moments. Exploring a pause menu Unity tutorial can guide you through setting up this essential feature, even if you’re aiming for something lightweight and straightforward.
While keeping it simple, you can still personalize the menu. Background dimming, subtle sound effects, and button highlights are small enhancements that make the menu feel more responsive and connected to the rest of your game. Even without advanced animations or graphics, a simple pause menu should feel clean, organized, and easy to use.
Another benefit of starting simple is that it’s easier to test. You can ensure that gameplay truly stops when the menu is open and resumes seamlessly when it’s closed. This also helps prevent bugs or unexpected behavior that could interrupt the user experience.
Why Every Game Needs A Pause Menu
Returning to the concept of a pause menu, it becomes clear that this feature is a basic necessity for any complete game project. A pause menu is not just about halting the game. It gives players control, which is essential for keeping them engaged and satisfied with their experience.
From an educational perspective, building a pause menu teaches developers about UI layering, input handling, and time management. These are core skills in game development that apply across all genres and platforms. Even a simple menu system can become the foundation for more advanced UI elements later in development.
Player expectations also play a major role. Most players assume that any game they play will allow them to pause. If this feature is missing, it can feel jarring or unpolished. Adding a pause menu, no matter how basic, immediately brings a sense of completeness to your game.
Additionally, pause menus provide a great opportunity to include helpful extras like gameplay tips, access to controls, or links to settings. These can be especially helpful in tutorials or early levels, guiding new players without overwhelming them during active gameplay.
Pause Menu UI Unity
Looking again at the Unity game pause menu, the challenge often lies in balancing design and functionality. It should stop the game effectively, but also provide a calm, user-friendly interface. Poorly implemented menus can be distracting or break immersion, so it’s important to test them in different contexts.
One important tip is to ensure that music, sound effects, and animations also pause correctly. A pause menu should provide a complete break, both visually and aurally. When the player pauses, the entire game should feel frozen in time until they choose to return. An effective pause menu Unity tutorial usually highlights these finer points, helping you create a pause system that feels smooth, complete, and fully integrated into your game.
You may also want to consider using overlays or transitions to introduce the menu. Fading in a slightly transparent background with the menu overlaid can give a professional feel without requiring complex graphics. These small design choices help keep the pause menu consistent with your game’s overall style. Even a Unity simple pause menu can benefit from these touches, making it feel more polished and thoughtfully integrated.
And while the menu might only be visible for a few seconds at a time, it should still look polished. Clear fonts, aligned elements, and smooth input transitions help keep the experience pleasant, even during these brief interactions.
Pause Panel Unity Tutorial
Returning to the idea of a pause panel Unity, the focus should be on functionality first. If you’re new to Unity or UI design, starting small is a smart move. You can always expand later with options like volume sliders, settings panels, or even save features.
Even in its most basic form, a simple menu gives players a much-needed control point. Whether it’s to take a break, adjust audio, or simply gather their thoughts, a pause option shows that you respect the player’s time and comfort.
As your game grows, you can iterate on the pause menu design. Add visual polish, tweak button layouts, or introduce new features. But the core principle remains the same: give the player control over when and how they interact with the game.
Conclusion
The pause menu Unity tutorial is more than just a technical step-by-step. It represents one of the core principles of good game design: player control. Whether you are creating a complex strategy game or a casual platformer, having a pause menu makes your game feel more complete, polished, and player-friendly.
Building a well-designed Unity game pause menu helps improve accessibility and usability. It provides players with a clear break in gameplay and a reliable space to adjust settings or take a breather. Even for short sessions, a pause menu adds structure and comfort to the experience.
Starting with a Unity simple pause menu is a great approach for developers learning the ropes. You do not need a complicated system to create a meaningful and useful feature. With thoughtful design and testing, even the simplest pause menu can make your game feel significantly more professional and enjoyable.

Script: PauseMenu.cs
using UnityEngine;
using UnityEngine.SceneManagement;
using UnityEngine.UI;

public class PauseMenu : MonoBehaviour
{
    public GameObject pauseMenuPanel;
    public Button resumeButton;
    public Button restartButton;
    public Button homeButton;
    public Button pauseButton;
    private bool isPaused = false;

    void Start()
    {
        // Initialize the pause menu as inactive
        pauseMenuPanel.SetActive(false);

        // Add button listeners
        resumeButton.onClick.AddListener(ResumeGame);
        restartButton.onClick.AddListener(RestartGame);
        homeButton.onClick.AddListener(GoHome);
        pauseButton.onClick.AddListener(PauseGame); // Add listener for Pause Button
    }

    void Update()
    {
        if (Input.GetKeyDown(KeyCode.Escape))
        {
            if (isPaused)
            {
                ResumeGame();
            }
            else
            {
                PauseGame();
            }
        }
    }

    void PauseGame()
    {
        pauseMenuPanel.SetActive(true);
        Time.timeScale = 0f; // Freeze game time
        isPaused = true;
    }

    void ResumeGame()
    {
        pauseMenuPanel.SetActive(false);
        Time.timeScale = 1f; // Resume game time
        isPaused = false;
    }

    void RestartGame()
    {
        Time.timeScale = 1f; // Ensure time is resumed before restarting
        SceneManager.LoadScene(SceneManager.GetActiveScene().name);
    }

    void GoHome()
    {
        Time.timeScale = 1f; // Ensure time is resumed before loading another scene
        SceneManager.LoadScene("MainMenu"); // Replace "MainMenu with the name of your home scene
    }
}
While setting up a pause menu improves user control, adding creative mechanics can make gameplay even more engaging. For example, if you’re working on a physics-based 2D game, our Unity 2D Change Gravity Direction guide shows how to add dynamic gravity shifts. You can also enhance interaction by letting objects respond to player input, and this Object Follow Mouse Unity 2D tutorial is a great starting point for implementing smooth mouse tracking behavior.
