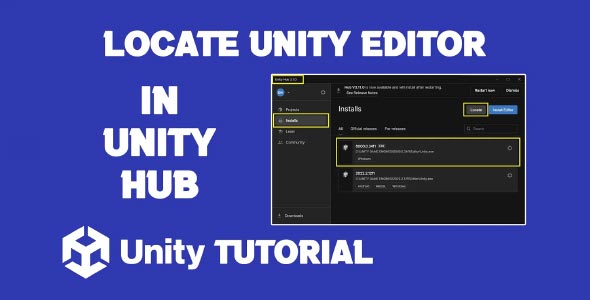
In this guide, we’ll walk you through how to make Unity Hub locate editor manually—step by step. If you’ve installed Unity Editor outside of Unity Hub or restored your development environment on a new machine, Unity Hub might not automatically detect the editor installation. This issue can prevent you from opening or managing projects properly. Fortunately, there’s a simple fix.
Knowing how to make Unity Hub recognize your existing Unity Editor installation can save you from reinstalling large files and get you back to development faster. Let’s explore all the ways to connect Unity Hub to an existing editor installation and solve this common issue.
Why Unity Hub Can’t Find Your Editor Automatically
When Unity Hub is first installed, it expects to manage Unity Editor installations itself. However, many developers download Unity Editor directly from the Unity website, use offline installers, or migrate from one system to another. In such cases, Unity Hub might not detect the editor’s presence because:
-
The editor was installed manually without Unity Hub.
-
Unity Hub was reinstalled or reset.
-
You moved the editor folder to a new drive.
-
A system cleanup removed registry or configuration files.
The result? You open Unity Hub, and under “Installs,” there’s no Unity version listed—despite the editor being installed on your system.
That’s where manual location comes in.
Unity Hub Locate Editor Manually (Step-by-Step)
If you’re asking how to Unity Hub locate editor manually, follow these instructions:
Step 1: Open Unity Hub
-
Launch Unity Hub on your system.
-
Go to the Installs tab (on the left-hand sidebar).
This is where all your Unity versions would normally appear.
Step 2: Click “Locate”
-
In the Installs tab, click the three-dot menu (⋮) in the top-right corner.
-
Select “Locate” from the dropdown.
This allows you to manually locate the Unity Editor installation on your machine.
Step 3: Find the Editor Folder
You need to point Unity Hub to the root folder of the Unity Editor installation. This folder should contain the Editor executable.
Typical installation locations:
-
Windows:
C:\Program Files\Unity\Hub\Editor\[version]\
or
C:\Program Files\Unity\Editor\Look for the Unity.exe file inside the Editor subfolder.
-
macOS:
Select the folder that directly contains the Unity.exe (Windows) or Unity.app (macOS), then click Select Folder.
Step 4: Verify in Unity Hub
Once selected, Unity Hub will register the editor and show it in your Installs list. You can now:
-
Set it as the default editor.
-
Create or open projects using this version.
-
Manage modules or uninstall if needed.
That’s it! You’ve now completed the Unity Hub locate editor process manually.
How to Add Unity Editor to Unity Hub (Without Reinstalling)
If you already have Unity Editor installed and don’t want to waste time or bandwidth reinstalling, here’s how to add Unity Editor to Unity Hub without downloading again.
Step-by-Step Instructions:
-
Launch Unity Hub and go to the Installs tab.
-
Click the three-dot menu and choose Locate.
-
Navigate to the folder where your existing Unity Editor is installed.
-
Select the appropriate directory as explained earlier.
Unity Hub will automatically detect the version and add it to your list.
Bonus Tip: Add Modules Separately
Unity Hub doesn’t automatically detect modules like Android Build Support, WebGL, or iOS when manually adding an editor. If you need these:
-
Click the gear icon next to the editor version.
-
Choose Add Modules.
-
Select and install the platforms/tools you need.
This ensures your Unity version is ready for cross-platform development without a full reinstallation.
How to Find Unity Editor Location on Your System
If you aren’t sure where Unity Editor is installed, here’s how to find Unity Editor location using system tools.
Method 1: Check Shortcut Properties (Windows)
-
If you have a shortcut to Unity on your desktop or taskbar, right-click it.
-
Select Properties.
-
Under the Shortcut tab, look for Target. This shows the path to Unity.exe.
Example:
C:\Program Files\Unity\Hub\Editor\2022.3.5f1\Editor\Unity.exe
You can then navigate to the folder above Unity.exe to locate the correct folder for Unity Hub.
Method 2: Use macOS Finder
-
Open Finder.
-
Go to the Applications folder.
-
Look for Unity, Unity Hub, or a folder named by version (e.g., Unity 2022.3).
-
Right-click the Unity app and choose Show Package Contents if needed.
The folder path you’re looking for typically ends in Unity.app.
Method 3: Search Manually
If the above methods don’t help, use your system’s search function:
-
Windows: Use the Start menu to search for Unity.exe.
-
macOS: Use Spotlight (Cmd + Space) and search for Unity.
Once you find the executable, right-click and choose “Open file location” or “Reveal in Finder” to get to the full path.
Why This Matters: Benefits of Locating Unity Editor Manually
Understanding how to make Unity Hub locate editor manually offers several benefits:
Save Time and Bandwidth
Reinstalling Unity Editors can take several gigabytes and lots of time. Manually linking existing installations lets you skip the download.
Restore Old Projects Quickly
If you switch computers or restore from backup, you won’t have to reinstall every Unity version—just reconnect them via locate.
Keep Multiple Versions
Many developers work with multiple Unity versions depending on project needs. Manually locating editors allows you to manage them flexibly in Unity Hub.
Common Problems and Fixes
Editor Doesn’t Show Up After Locate
-
Check if you selected the correct folder: It must be the one containing the actual Unity.exe or Unity.app.
-
Ensure no version mismatch: Unity Hub only supports specific editor structures. Installing from non-official sources may cause issues.
Editor Crashes or Errors
-
Try reinstalling Unity Hub (your projects won’t be deleted).
-
Ensure your manually added editor is not corrupted. Try opening it directly (outside Unity Hub) to verify.
Advanced Tip: Locating Editors via Command Line (Optional)
If you’re managing Unity installs across multiple machines or using CI/CD systems, you can also point Unity Hub to editors via config files or command-line automation.
-
Unity Hub config location:
-
Windows:
-
macOS:
Inside, you’ll find settings files where Unity Hub stores information about installed editors. You can script updates to these files for automation.
-
Conclusion
Learning how to make Unity Hub locate editor is an essential skill for Unity developers—especially when managing multiple versions, restoring from backups, or collaborating across machines.
If you’ve installed Unity manually or lost connection between Unity Hub and your editor, the process of locating the editor is quick and efficient. It saves you from wasting time and bandwidth on unnecessary reinstalls.
Understanding how to add Unity Editor to Unity Hub allows you to better organize your development environment, especially when working with different Unity versions for different projects.
And when you’re unsure where Unity Editor is installed, knowing how to find Unity Editor location helps you reconnect it to Unity Hub easily and resume development without delays.
By following the steps in this guide, you’ll have complete control over your Unity setup—and that means fewer headaches and more time building awesome games.
If Unity Hub is unable to detect your installed editor, it could be due to an incomplete installation or leftover files from a previous version. In such cases, it may help to start fresh by following our guide on How To Uninstall Unity Completely before reinstalling. Once you’re ready to set everything up again, be sure to check out How To Install Unity Game Engine for a step-by-step walkthrough of the installation process.


